These instructions are for X-Plane 10. To see the instructions for X-Plane 11, click here.
First, locate the directory that X-plane is installed in. In that directory there is a folder called Resources, and in that, one called plugins. You'll need to put the planecommand folder in there.
Next time you launch X-plane, you should see PlaneCommand in the plugins menu, and a headset icon in the upper right hand corner of your screen. If you don't see either of these, verify that the PlaneCommand folder is in the right directory.
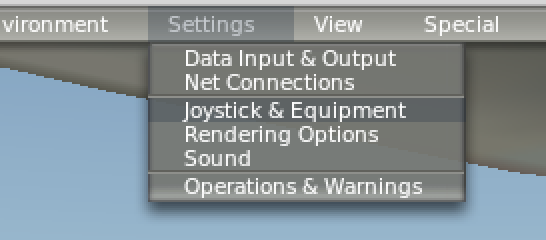
Next, configure a button to use as a push-to-talk button. You'll hold this button down whenever you want planecommand to listen. Go to Joystick and Equipment to assign a key.
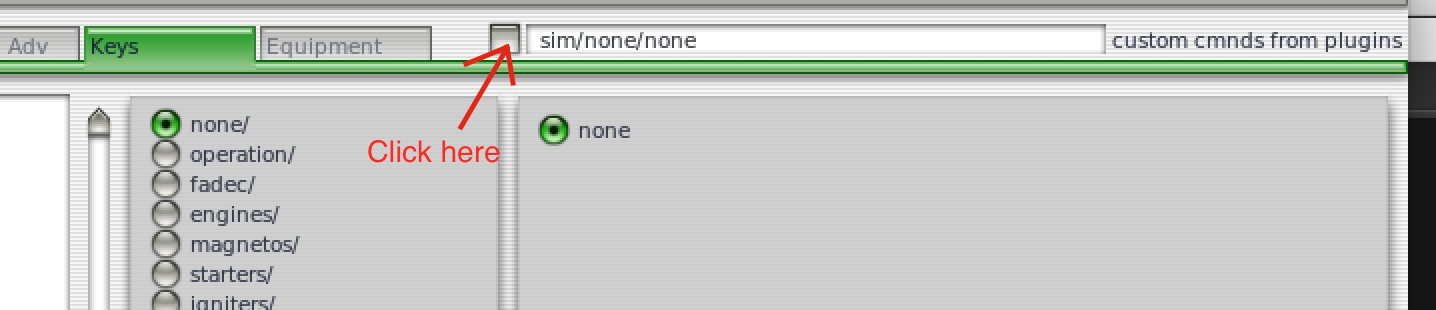
Add a new key mapping, and pick a key to use. To map this key to PlaneCommand, click in the custom commands area:
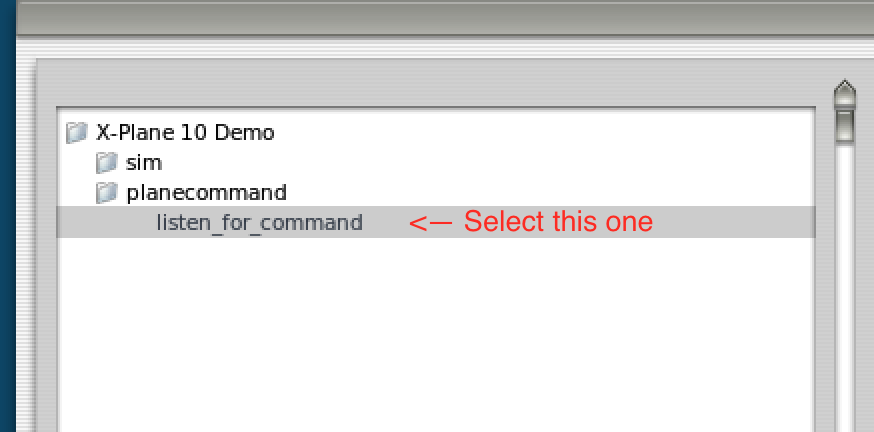
and select planecommand/listen_for_command:
Press OK, and it's ready to test! You can also map a button on your joystick- that's what I use.
When you press the button, you'll see the headset icon light up. As you speak, the icon will pulse with your voice. If you don't see this, ensure that your microphone is switched on, and the volume is adjusted properly.